User Guide: CLI / GUI
This section will guide you through performing a methylation analysis using the Mepylome command line interface (CLI) and graphical user interface (GUI).
Graphical user interface: Quick demonstration
To perform a test methylation analysis, run the following command in the terminal after installing mepylome (and optionally activating the corresponding virtual environment). This command will download example IDAT files (to ~/mepylome/ and launch the GUI. Note that the initial launch may take some time:
mepylome --tutorial
After pressing the start button, the beta values are extracted, and the UMAP plot is generated. Clicking on a dot in the UMAP plot should display the corresponding CNV at the bottom of the browser window. You should see something similar to the following:
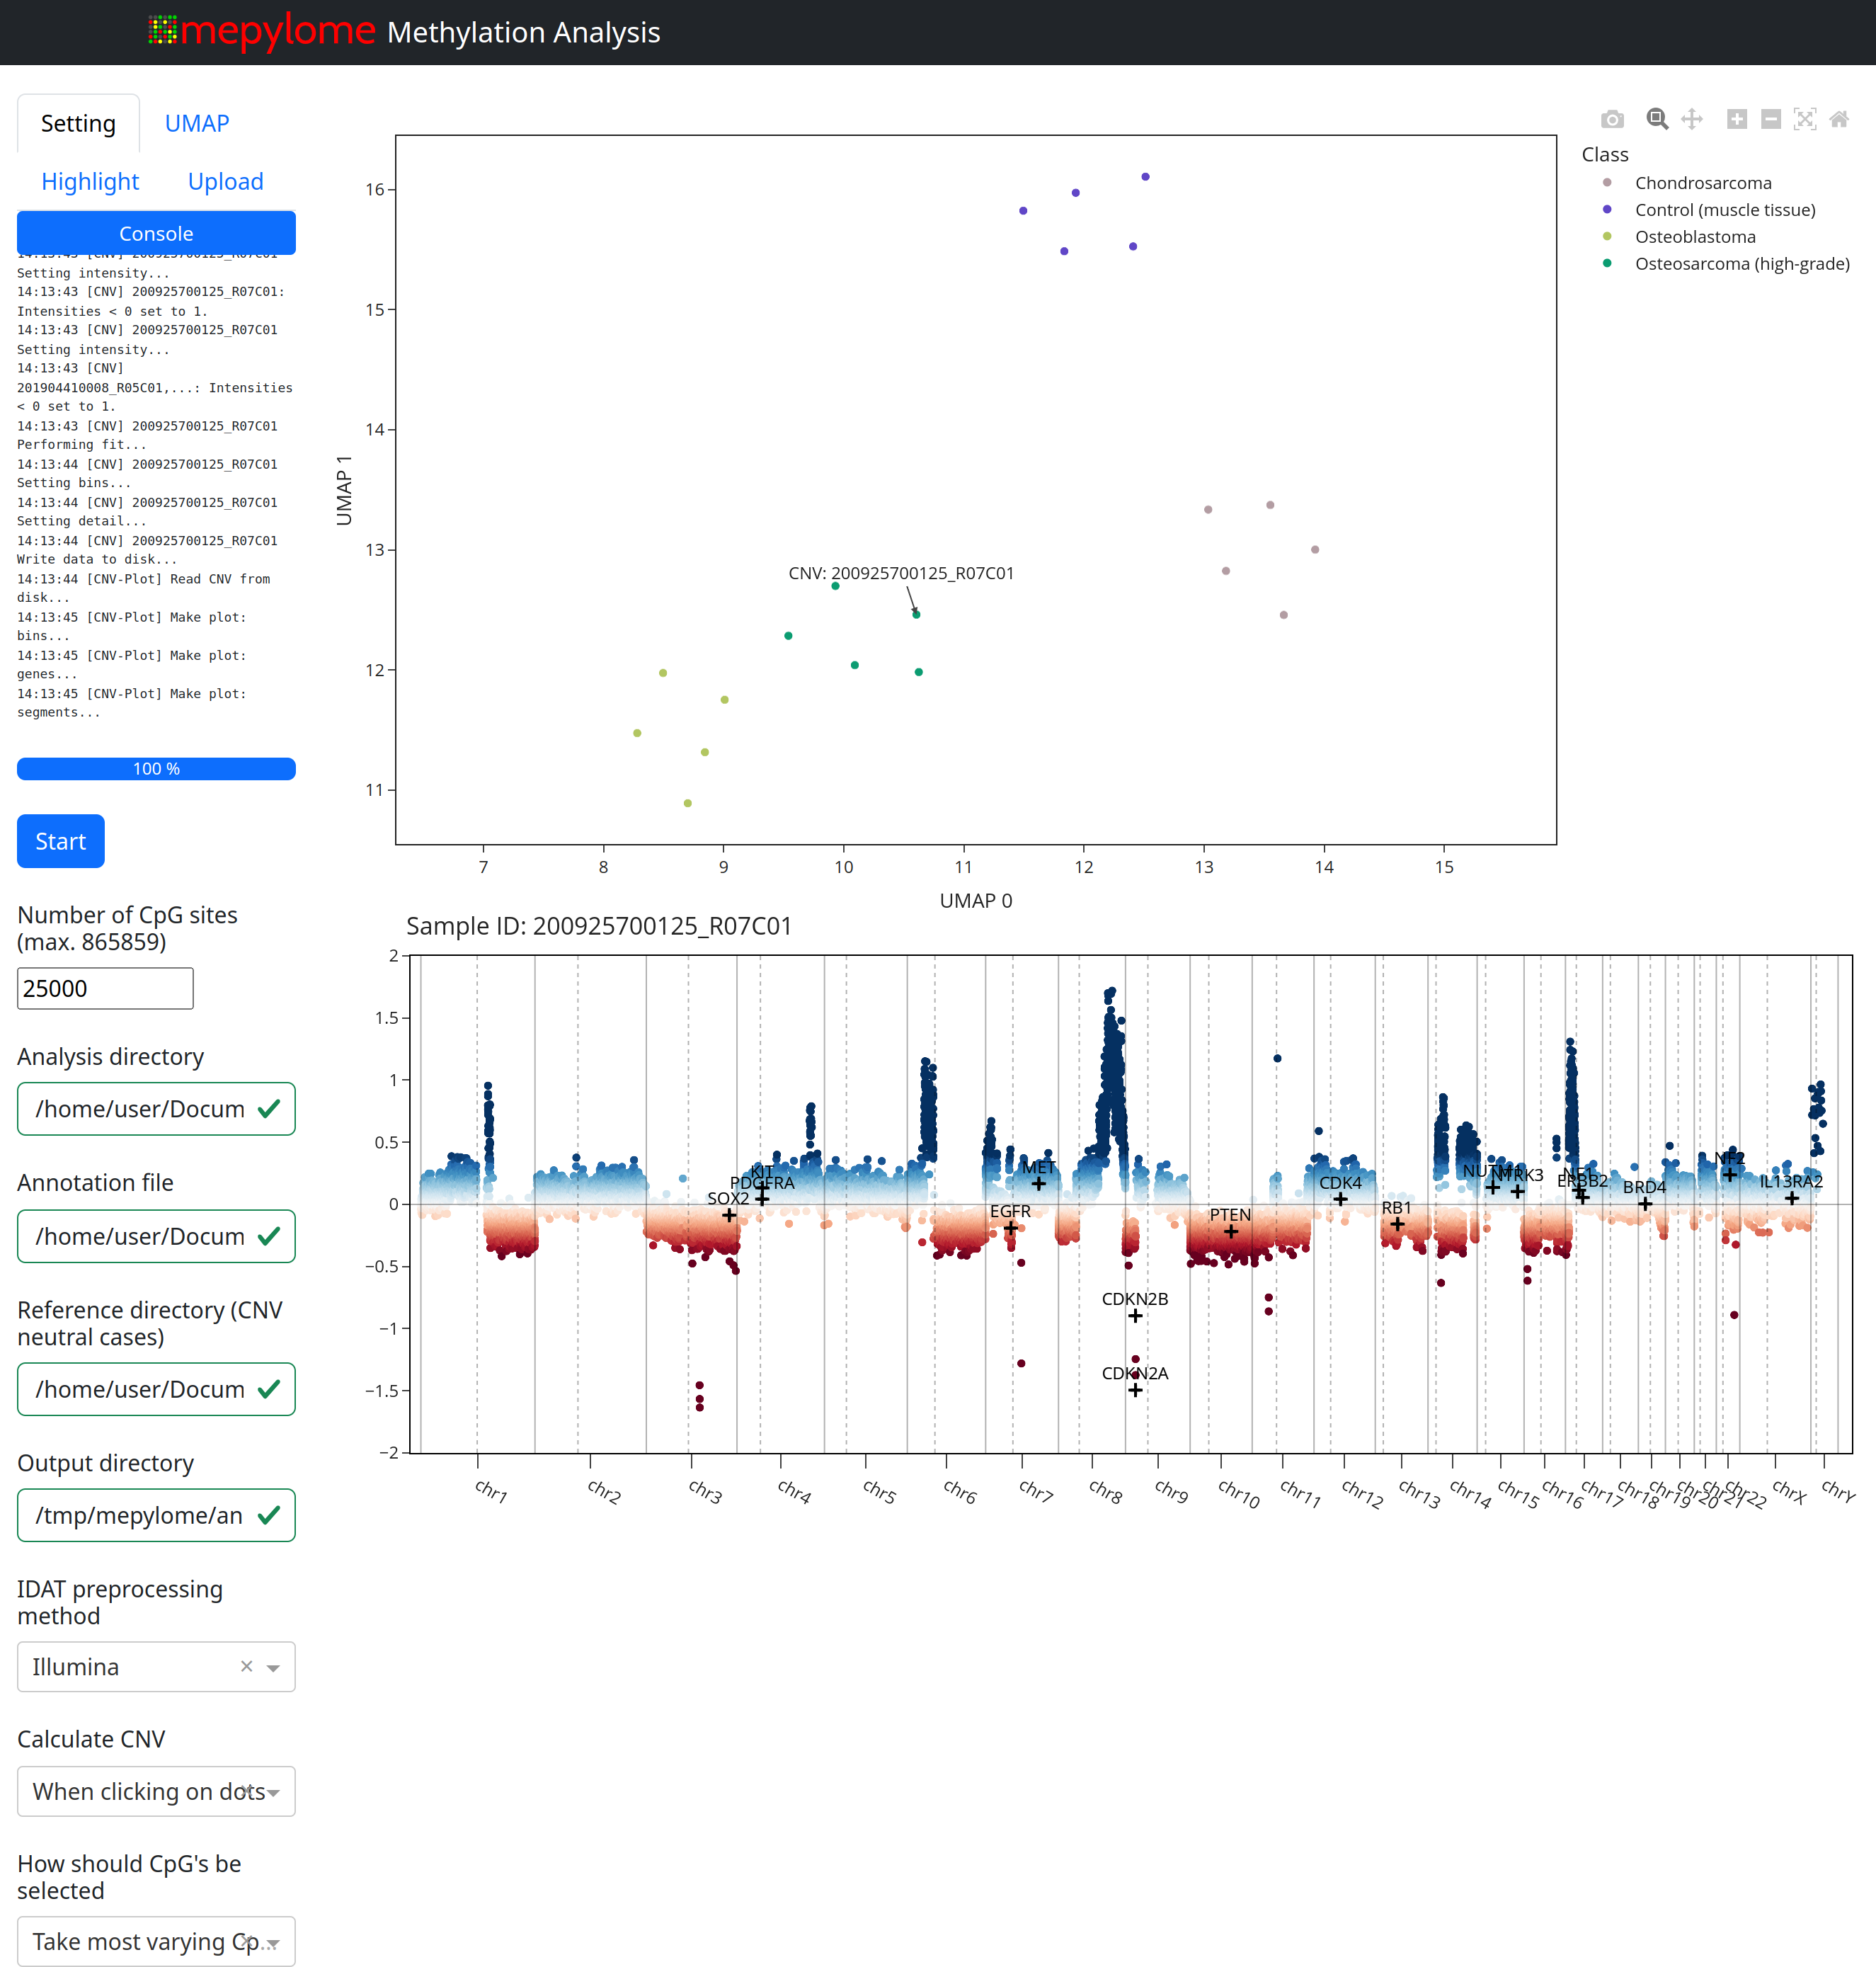
The GUI offers the following capabilities:
Change directories (analysis, reference, annotation, output).
Modify precalculation methods.
Adjust CpG selection methods (‘top’, i.e. most variable, and ‘random’) and number of CpGs.
Configure UMAP algorithm settings.
Customize UMAP coloring based on columns provided in the annotation file.
Highlight specific cases.
Highlight genes in the CNV plot.
Upload IDAT pairs for visualization in the plot upon rerunning.
General Setup
For methylation analysis, ensure that the following files and directories are in place:
Analysis Directory (analysis_dir): Contains the IDAT files that you wish to analyze.
CNV-neutral Reference Set (reference_dir): Located in a separate directory for generating CNV plots.
Annotation File (annotation): An optional spreadsheet containing sample-specific information. This file must meet the following criteria:
It must have a header row.
One of the columns should contain either the exact IDAT basenames or the Illumina Sentrix IDs that correspond to the samples in the analysis directory.
Additional columns can contain other sample-specific information (e.g., diagnosis, tumor grade, tissue type, treatment, etc.).
The annotation file can either be placed directly inside the analysis directory (mepylome will search recusrively and select the first found spreadsheet) or provided explicitly during initialization if it’s located elsewhere.
Both analysis_dir and reference_dir can contain IDAT files of various array types and may include multiple subdirectories. Mepylome searches for all IDAT files recursively within these directories.
In the GUI, you can color the UMAP dots based on any column in the annotation file (for example, diagnosis or tumor grade). You can also combine multiple columns to create more complex color mappings (such as coloring the dots based on both diagnosis and tumor grade). The annotation file can be placed directly within the analysis directory for automatic detection by Mepylome, or you can explicitly provide the file path during the initialization phase.
Example Structure and File Organization
Here’s an example of how your directory structure might look:
projects/
    ├── analysis_dir/
    │   ├── annotation.csv    # Annotation file with sample information
    │   └── idat_files/       # Subdirectory containing IDAT files
    │       ├── 200925700133_R02C01_Grn.idat
    │       ├── 200925700133_R02C01_Red.idat
    │       ├── 200925700133_R03C01_Grn.idat
    │       ├── 200925700133_R03C01_Red.idat
    │       ├── 200925700133_R04C01_Grn.idat
    │       ├── 200925700133_R04C01_Red.idat
    │       ├── 200925700133_R05C01_Grn.idat
    │       ├── 200925700133_R05C01_Red.idat
    └── reference_dir/
        ├── 201904410008_R02C01_Grn.idat
        ├── 201904410008_R02C01_Red.idat
        ├── 201904410008_R03C01_Grn.idat
        ├── 201904410008_R03C01_Red.idat
        ├── 201904410008_R04C01_Grn.idat
        ├── 201904410008_R04C01_Red.idat
        ├── 201904410008_R05C01_Grn.idat
        ├── 201904410008_R05C01_Red.idat
        └── 201904410008_R06C01_Grn.idat
The file annotation.csv should have the following structure:
IDAT |
Diagnosis |
Site |
|---|---|---|
200925700133_R02C01 |
Osteosarcoma |
Femur |
200925700133_R03C01 |
Osteosarcoma |
Humerus |
200925700133_R04C01 |
Osteosarcoma |
Femur |
200925700133_R05C01 |
Osteosarcoma |
femur |
That is:
IDAT,Diagnosis,Site
200925700133_R02C01,Osteosarcoma,Femur
200925700133_R03C01,Osteosarcoma,Humerus
200925700133_R04C01,Osteosarcoma,Femur
200925700133_R05C01,Osteosarcoma,Femur
After completing the quick demonstration (tutorial), you will have a valid setup in ~/mepylome/tutorial/.
Comand line interface
To start mepylome from the command line without specifying any parameters:
mepylome
To start mepylome with specific analysis and reference directories:
mepylome -a ~/mepylome/tutorial/tutorial_analysis/ -r ~/mepylome/tutorial/tutorial_reference/
To see all available command-line parameters and options for mepylome, use the help command:
mepylome --help
Output data
The default output directory is /tmp/mepylome. You can change this using the --output_dir option. Please note that the output directory may grow in size over time. If you encounter memory issues, you can safely delete the entire directory or its subfolders.
Once downloaded and transformed, manifest files are saved under ~/.cache/mepylome.